


WordPress Coding Standard (WPCS) is a code writing standard approved by the WordPress community. These standards make it easier for developers to read, write, and understand code written by other developers. When we develop a custom block plugin, for example, we need a writing style that is approved by the public, especially if we want to publish or upload the plugin to the WordPress repository.
Differences Between WordPress Coding Standards and Other Writing Styles
In short, WPCS was created for the WordPress ecosystem itself. Based on the official WPCS article, some of the differences between WPCS and other writing styles are as follows:
1. More spacey code writing
WPCS is known for a coding style that employs more whitespace than standard conventions. This distinction is clearly evident in JavaScript programming; in fact, the WPCS JavaScript Coding Standard article explicitly states: “When in doubt, space it out.”
Use spaces liberally throughout your code. “When in doubt, space it out.”
2. The use of array() instead of []
Another notable difference is the use of array() instead of []. This is particularly evident in the PHP programming language, where this standard is defined in the WPCS PHP Coding Standards.
Arrays must be declared using long array syntax.
How to Set Up WPCS for a WordPress Project
Before setting up WPCS for a WordPress project, we need to prepare the following:
- Composer installed on the device
- A code editor (in this case, VRDA uses VS Code)
- A WordPress project
Once these three requirements are ready on your device, we are set to install WPCS. Please note that this tutorial covers a project-specific installation, rather than a system-wide installation on the device.
1. Install Composer
Composer is a dependency manager for the PHP programming language. Here are the steps to install Composer in a WordPress project:
- Open the project in your code editor.
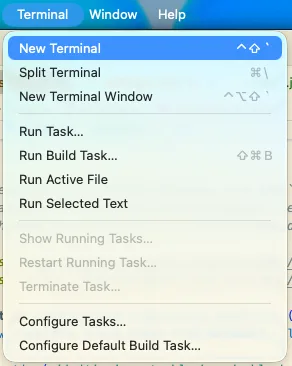
- Open the terminal within the code editor. If you are using VS Code, you can go to Terminal > New Terminal.
- Ensure the terminal is pointing to the project folder.
- Run the following command in the terminal:
composer initWait until the initialization process is complete.
2. Install WPCS
Still in the same terminal, run the command to install WPCS:
composer config allow-plugins.dealerdirect/phpcodesniffer-composer-installer true
composer require --dev wp-coding-standards/wpcs:"^3.0"
3. Install PHP Code Sniffer
Code Sniffer is a VS Code plugin that detects violations of a coding standard. To install it, run the following command in the terminal:
composer require "squizlabs/php_codesniffer=*"4. Setup Code Sniffer
Next, we need to add the WordPress coding standards to Code Sniffer. Run the following command in the terminal:
vendor/bin/phpcs --standard=WordPress .5. Activate Format on Save
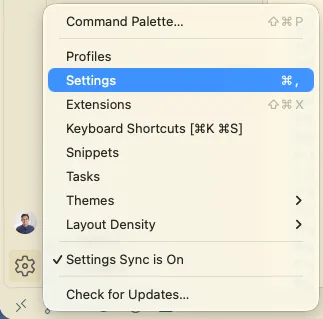
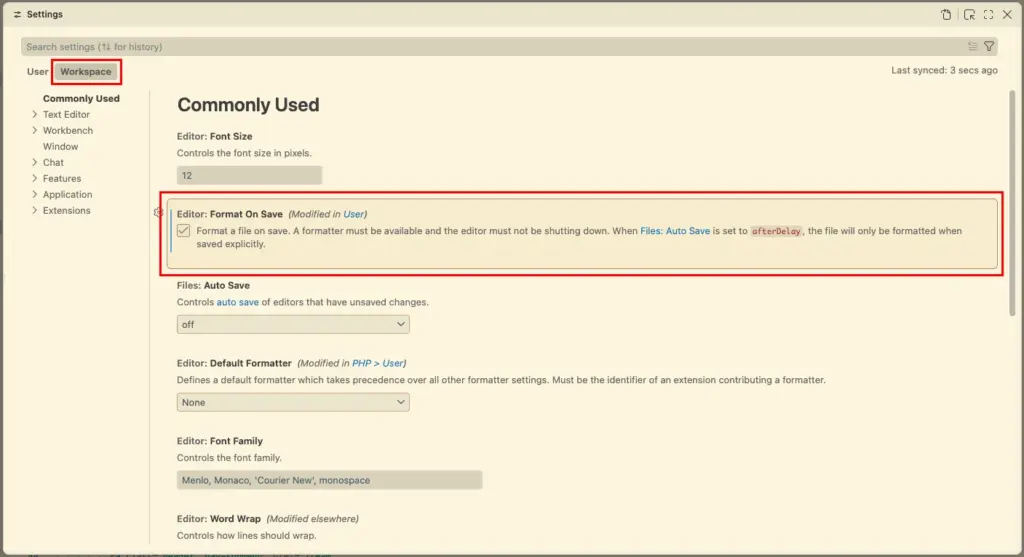
“Format on Save” enables automatic code formatting when saving a project. Activate it by clicking the gear icon below your VS Code profile and selecting “Settings.” Then, check the “Format on Save” option under the “Workspace” tab.
After following the steps above, we should be able to apply WPCS to our WordPress projects, and VS Code will automatically make corrections whenever we save.
Hope it helps!